Pumpkin Party

We know, we know. Fall has quickly turned into pumpkin overload. Pumpkin lattes, cupcakes and cookies have taken over menus and Pinterest pages. But with Thanksgiving just around the corner, it’s a great time to use left-over pumpkins for table  settings or decor around the house.

Here a are a few last-minute ideas to design or decorate your pumpkin. You can use glitter, paint, markers, tacks, pins or studs to create a variety of designs. We’re personally loving the white pumpkin trend!

Use your pumpkin as a DIY vase for a floral arrangement to accent your table, mantle or front porch! Cut a whole in the top of the pumpkin, dig out the seeds and place a small coffee canister or glass to hold the flowers – keep fresh with water. Get more details here.

dbdb0f55e589a53acfe9defa522971ee

Check out these white pumpkin designs from the Brassy Apple blog and their awesome paint pen pumpkin ideas.

diy paint pen white pumpkins

The Waiting on Martha blog has great tips on DIY pumpkins and designs.

DSC_0864-1024x755

Check out this idea from South Carolina Wedding Blog to put your drink menu or fall menu on the pumpkin using chalkboard paint.

Bootle_Manall_Richard_Bell_Photography_bootle0060_low-200x300

Our friend sent us in this DIY-inspired pumpkin design featuring glitter in beautiful fall colors.

photo.PNG

Get inspiration and tips on how to make this pumpkin here! Or check out the DIY Bar Pinterest page Pumpkin Party for more tips on beautiful pumpkins.

Up, Up and Away Shower…Revealed!

Kelsey’s baby shower was ages ago (it was in July!). In fact, “peanut” as he or she is fondly called by mom and dad, is expected to arrive any day now. However, we’ve been very busy this summer and haven’t gotten to post the pics until right now…better late than never, right? We had SO much fun planning this shower with the gorgeous mama-to-be.  The hot air balloon theme is beyond adorable. To help make it come to life we replicated Kelsey’s shower invitation onto a chalkboard welcome sign, made an adorable hanging hot air balloon centerpiece, and created little flags with theme-appropriate phrases and photos to stick in the delicious food.  The colors Kelsey chose: peach, minty green, baby blue and yellow, were brought out in the adorable fabric we found and used to tie the bamboo cutlery and also in the buntings that hung over the fireplace and windows.  The flowers were a mix of Lambs Ear and Dahlia’s, arranged in twine/ribbon-wrapped mason jars (which we made at the craft party a few weeks before the shower).  We particularly loved the mimosa bar, which guests drank out of mason jars and paper straws.  There was so much gorgeous detail in this shower, and you really just need to look at the pix to see it all. We can’t wait to hear your thoughts!

ps- the GORGEOUS photography was done by Leigh at Nadra Photography. SO amazing. Thank you, Leigh!

babyshower_balloons

babyshower_welcomesign

babyshower_hotairballoons1

babyshower_cutlery

babyshower_mantel

babyshower_flowers1

babyshower_spread1 babyshower_mimosabar2 babyshower_mimosabar

babyshower_mimosa3

babyshower_foodsigns1

babyshower_cake1 babyshower_bunting

babyshower_kelsey1 babyshower_kelsey2

Friday Favorites: Wedding Favors!

A big trend this year is DIY wedding favors. Couples are pulling out all the stops to provide awesome gifts and swag for their guests to enjoy at the wedding – and after. There’s no better way to say thank you for coming than to offer a fun and creative party favor, especially one that reminds them of your special day. Here are a few of our favorite DIY wedding favors this Friday. Some are perfect for guests to actually use at the wedding, others are a nice treat to take home.

Check out these Johnny Cash inspired matches from Style Me Pretty.

lightmyfire

Create your own sunglass station with cute signage.

shades

These sparklers are a great addition to any party and fun for photos!

Sparklers

We’re loving this DIY personalized mixed CD from the bridge & groom. Create a soundtrack from your wedding or a mix of your favorite songs.

cd

People love a sweet treat, so try wrapping up your favorite dessert for your guests.

dessert

Need more ideas on DIY favors? Check out our party favors board or let us know, what’s the best favor you’ve received at a wedding?


White Wedding After Labor Day

Tags

, , ,

Believe it or not, Labor Day is just around the corner, and if you’re planning a Fall or Winter wedding you may be wondering: can I wear white to my post-labor day wedding?? We, for three, are of the opinion that this old adage is just exactly that-old. To prove that white (or ivory or cream) are perfectly lovely even after September, we’ve rounded up some of our favorite fall/winter wedding looks for your viewing pleasure.

Sleeves, long, short or even capped make even the brightest of white dresses feel perfectly appropriate come cooler months. 

sleeves2 sleeves3 sleeves4 sleeves5 sleeves6 sleeves7 sleeves8 sleeves9 sleeves10 longsleeves1

Another sure-fire way to bring your white dress up to code come Fall or Winter? It’s all in the fabric.  Silky satins, sparkly sequins and poufs of tulle are sure to make your dress a standout this time of year.

fallwinterdress1 fallwinterdress2 fallwinterdress3 fallwinterdress4 fallwinterdress5 fallwinterdress6 fallwinterdress7 fallwinterdress8 fallwinterdress9 fallwinterdress10 fallwinterdress11 fallwinterdress12 fallwinterdress13 fallwinterdress14 fallwinterdress15 fallwinterdress16 

Even if the dress itself doesn’t scream “seasonably appropriate” (because, afterall, you should choose your dream dress based on how it makes you feel, and not for any other reason!), bridal accessories are a easy way to pull your Fall or Winter look together.

fallwinteraccessories1 fallwinteraccessories4 fallwinteraccessories5fallwinteraccessories3fallwinteraccessories2fallwinteraccessories6

Be sure to check out these pix and so many more on our Pinterest page!

DIY Bookcases

When I moved into my apartment a little over a year a go, I searched every store in the greater Portland area to find good furniture and décor. One thing I quickly realized is that it’s really tough to decorate your space with no budget. For those lucky enough to have an IKEA in your hood, enjoy it. IKEA is great for cute, but affordable furniture and tons of great home décor options. Craigslist is another option, but then there’s the hassle of transport and buying someone’s used goods. That’s when DIY comes in handy for a good dose of apartment therapy.

I’m in the market for a new bookcase or shelving unit and the pages of Pinterest did not disappoint. If you’re looking for a fun, DIY project to create storage space or unique décor, check out these cute DIY shelving ideas.

For under $20, this DIY bookshelf is white and can be filled with photos, flowers and other fun décor items.

whitebook

Go the extra mile and touch up the crates with some blue paint to brighten up the room.

Cobalt-Crate-Book-Case-Project-at-www_thebensonstreet_com_

And if you’re feeling extra crafty, why not turn that old bookcase into a bar? This past weekend, I visited some friends in Boston who had just moved into a new apartment. They had repurposed an old bookcase with some paint and wallpaper and added in glassware and mixing tools for the perfect bar.

book bar

Check out our Pinterest page for this idea above and other DIY bookcases. Happy DIYing!

DIY Envelope Liners

We here at the DIY bar will take absolutely any opportunity to add a little glitz and glam to a project, and an invitation is no exception.  The invitation is the first impression that someone has of your event, so we think it’s a good idea to make that impression a great one.  For us it’s not just about the invitation, but the whole pretty little package it comes in.  While you may quickly tear open and discard an envelope to get to the goods inside, we will savor every moment of opening, especially if the sender took the time to make the envelope extra pretty.  So, if you’re looking to fancify your envelopes, we suggest you try our latest DIY! It’s actually preeeeetty easy…here’s what you’ll need:

diy env liner materials

Step One: trace the shape of your envelop on the back of your pretty paper. You’ll want to trim off a bit of the bottom so that the lickable part is exposed for sending. You can do this at the beginning by leaving off a bit of the bottom of the envelope in your tracing, or at the end and trim the bottom of your cut out…up to you!

diy env liner trace

Step Two: Cut out the shape!

diy env liner cut out

Step Three: insert the liner into the envelope and make sure it fits. Make any necessary adjustments.

diy env liner insert

Step Four: Once your liner fits in perfectly, fold the envelope as if you were going to seal it to get a crease in the liner.

diy env liner fold

Step Five: Attach 2 (or as many as necessary to get a snug fit against the back of the envelope) pieces of double sided tape on the back of the liner.

diy env liner attach tape

Step Six: press to seal and VOILA! you’re done.

finished envelope liner

See? How easy was that?? Now try doing over 100 of them…oy! Think you might try it? Send us a pick if you do, we’d love to see your take on this easy DIY.

Happy DIY’ing!

the DIY bar

Photo Booth- Buy or DIY?

One wedding trend that is showing no signs of slowing down in the near future is having a photo booth at the reception. Photo booths are a creative way to get some hilarious shots of your guests- and let them have a little fun in the process- dressing up in funny costumes and playing with silly props!  There are two different types of photo booths- the one you rent and the one you can DIY! Both types come with pros and cons, so let’s break it down and help you determine whether you should buy or DIY!

photoboothdiy1

Rental Photo Booth: The standard photo booth rental usually comes with several components- You get the actual physical booth, a variety of props and costumes, an attendant, and the ability to ‘print’ photos instantly.

photobooth rental 2 photobooth rental 1

Pros:

1). No work required! Renting a photo booth is easy! The attendant does all the work for you; from set up to break down and makes sure things are going smoothly.

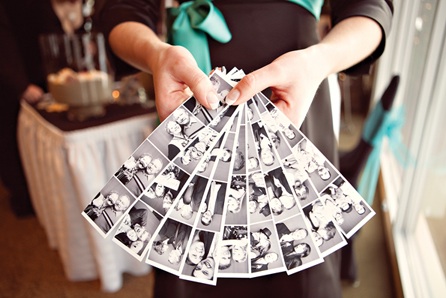
2). Souvenirs. Usually when you rent a photo booth, it comes with the ability to instantly print your guest’s photo strip- giving them a memory to take home, and most print more than one strip, letting you keep one for yourself to add to your wedding photo album.

3). Digital copies. Most rental companies will give the bride + groom digital copies of all photos taken during the event. Now you can post those ridiculous photos of your friends on facebook- score!

Cons:

1). Cost. These don’t come cheap. Unless you’re lucky and score a Groupon, expect to shell out between $500-1200, plus some additional fees.

2). Everybody is doing it. If your wedding is bursting with originality, renting a photo booth that you’ve seen at the 12 other weddings you’ve been to in the past year sort of diminishes that.

3). Appearance. These are usually big, bulky set ups. If your wedding is on the fancy schmancy side- this might look out of place and awkward. And if your wedding has that rustic, old fashion theme to it, a hulking piece of equipment is going to look strange.
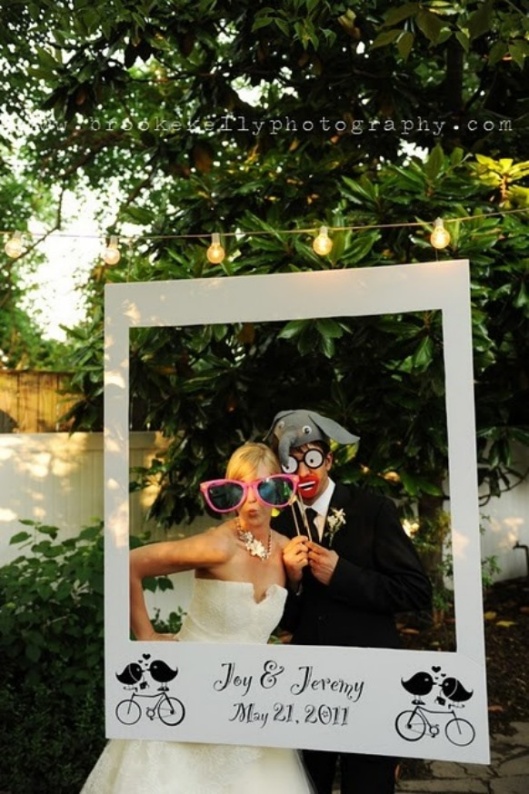
DIY Photo Booth

If you’re choosing to go the DIY Photo Booth Route, you’ve got some work ahead of you but the end result could be exactly what you want! From hanging picture frames to clever back drops, having a DIY photo booth at your event lets you be in control.

photobooth diy pic 2 photobooth diy pic 3 photobooth diy pic 4

Pros:

1). Let your creative flag fly! Sure you might have to put some blood, sweat and tears into it- the end result is going to be a fun experience for your guests that seamlessly fits into the theme of your wedding. You get to pick how it looks, what props are available and so on. Plus, since you made it, it will be super original!

2). Cost. If you go the DIY route you can control what you spend- as much or as little as you want. You can use materials you have lying around to create the space and backdrop (old blankets, sheets, picture frames) – and you can dig through your closets to pull out old Halloween costumes or goofy shades to use as props!

Cons:

1). Who is going take the photos? With a DIY photo booth, you need to factor in the actual photos! Are you going to set up a tripod with a camera? Are you going to hire an extra photographer? Have disposable cameras at the ready? Polaroid’s? A BIG detail that you need to have covered.

2). No Souvenirs. Unless you have a polaroid camera set up, your guests won’t get the instant satisfaction of seeing their goofy pic- or get to take anything home with them. Whatever way you go- having a photo booth at your wedding or event is a fun extra for you and your guests to enjoy and really captures some amazing moments!

Whatever way you go- having a photo booth at your wedding or event is a fun extra for you and your guests to enjoy and really captures some amazing moments!

Friday Favorites

This rainy Friday has us thinking about one thing. Curling up with a blanket and a glass of wine to PIN, PIN, PIN! If you’re in need of a little DIY inspiration to get your weekend started right, check out these fresh ideas from our Pinterest page.

Dinner time. Ever have that feeling that it’s time to kick it up a notch in the kitchen? Sometimes our recipes get outdated or we just get sick of making the same old thing. That is why we love this recipe for chicken fajita kabobs. Hello, chicken fajits + kabobs = genius! Perfect for a dinner at home or for a party platter.

chicke kabobs

Hair Do! Our favorite thing about summer is wearing our hair as casually as possible. Loose waves or a big bun are awesome, but one thing that will never go out of style is the braid. Add a few small ones or one big one and you’ve got a beautiful look that’s easy for everyday wear. Here’s some how-to’s for fun styles.

hair1

Lighten up. We love how unique light fixtures can change up a room. Even at special events or weddings, lights can make a big difference with décor. If you’re looking for a fun home project, check out this well-lit headboard. The window pane effect brings the whole look together.

headboard

Pretty Planter. Now we don’t all have a green thumb, but this easy DIY project to turn an ordinary tin can into a beautiful planter got us excited. The neutral colors allow any flower to pop – and it could be perfect for indoor or outdoor use.

diy-rock-covered-bucket-label-cg

Inspire me. Here at the DIY Bar, we love a little creative inspiration and encouragement. This quote says it best. Happy weekend, DIYers. Now get out there and create something!

creativity quotes

Remembering Loved Ones

So many of my friends are getting married this summer, and more will take the plunge this fall, and it has been, and will be, an absolute blast to celebrate with them as they embark on this new chapter of their lives.  Yet it seems as though, with all the joy that has come out of this summer, there has also been a lot of loss.  Many friends, and myself included, have lost loved ones with whom we had hoped to share special moments in the months ahead. If you have found yourself in a similar predicament, you may be wondering how to remember those who you and your partner have lost, recently or even long ago, during your ceremony and/or reception.  Here are my thoughts..

Image

ImageImage

Image

Image

Image

Image

Image

Winter Wedding Inspiration

With less than six months to go and two out of seven weddings I’ll attend this summer under my belt, I’m dreaming up a ton of wedding inspiration, and in particular, winter wedding inspiration! Because we are going to so many summer and/or outdoor weddings this year, I am particularly excited about planning my own cold weather, indoor extravaganza. I can’t wait to make the huge space we’ve chosen for our venue seem elegantly cozy with fur throws, winter whites and candlelight. Here are some of the pins that are inspiring my thoughts about my big day…

ImageImage

Image

ImageImageImage

Image

ImageImage

ImageImageImageThere’s way more where that came from, so feel free to follow me on Pinterest! (and follow the DIY bar if you aren’t already for crazy awesome pins, all the time!)

Talk to ya later,

Liz